Dungeon guide · 5 players
Wailing Caverns
Kill the four Fanglords for Embrace of the Viper pieces, then run Naralex's escort, which unlocks only after they die. A Barrens run for late teens.
- Level range
- 17–24
- Enter at
- Level 10
- Players
- 5
- Location
- The Barrens
- Bosses
- 8
- Region
- Kalimdor
On this page
Overview
Wailing Caverns is a sprawling cave system under the Barrens. The night elf druid Naralex set out to heal the Barrens through the Emerald Dream and fell into a nightmare instead. His dreams twisted the caverns' wildlife into deviate beasts, and his own followers, the Druids of the Fang, fell to the nightmare too. Their four leaders, the Fanglords, now rule the caves.
It's a long run for characters in their late teens, and it pays off. Four pieces of the Embrace of the Viper leather set drop from the Fanglords, Horde players carry a stack of quests, and the run ends with an escort event that only unlocks once all four Fanglords are dead.
Getting there
The caverns open into the hills southwest of the Crossroads, in the Barrens. Walk into the huge cave mouth and follow the outer caverns to the instance portal. Deviate beasts roam the approach, so don't arrive on half health.
The Barrens are Horde territory, but Deviate Hides, Deviate Eradication, Smart Drinks and Trouble at the Docks are open to both factions, so Alliance groups have plenty to do here too.
Map
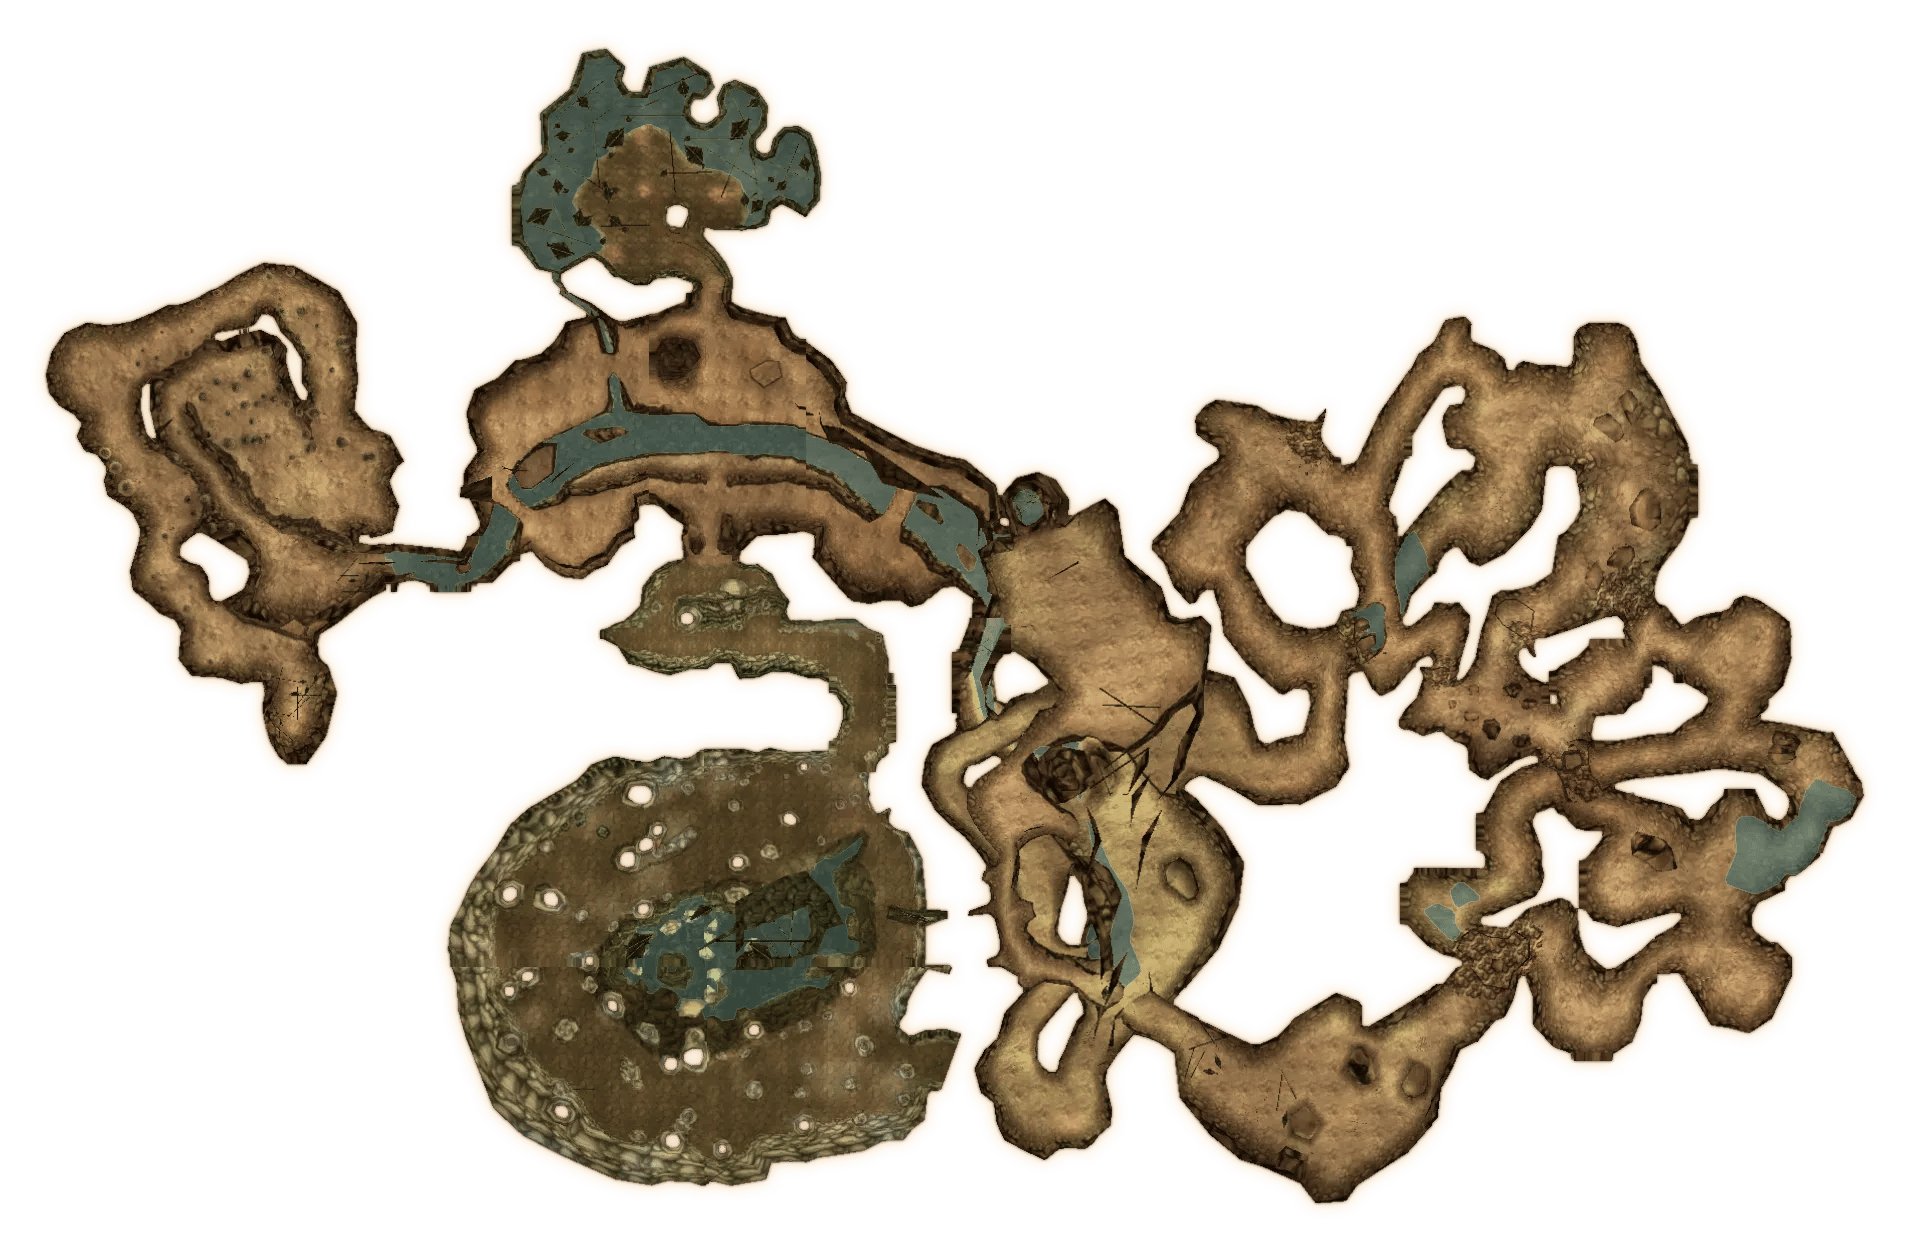
Hover or focus a pin for a quick look; select it for its details here.Tap a pin for its details here.
- Boss
- Entrance
- NPC
Quests
Horde groups come for Leaders of the Fang: bring the Gems of Cobrahn, Anacondra, Pythas and Serpentis to Nara Wildmane in Thunder Bluff. Those are the four Fanglords you kill anyway for the final event. Hamuul Runetotem and Nara Wildmane are the short speak-with steps that lead to it.
Pick up the rest before you zone in. The Glowing Shard comes later, from Mutanus himself:
- Serpentbloom: 10 Serpentbloom for Apothecary Zamah in Thunder Bluff. Horde only.
- Deviate Hides: 20 Deviate Hides for Nalpak, who waits in the Wailing Caverns.
- Deviate Eradication: kill 7 each of Deviate Ravagers, Deviate Vipers, Deviate Shamblers and Deviate Dreadfangs for Ebru, also in the Wailing Caverns.
- Smart Drinks: 6 portions of Wailing Essence for Mebok Mizzyrix in Ratchet.
- Trouble at the Docks: take the bottle of 99-Year-Old Port back from Mad Magglish, who's hiding in the caverns, for Crane Operator Bigglefuzz in Ratchet.
- The Glowing Shard: Mutanus drops the Glowing Shard that starts it. Take the shard to Ratchet, find someone who can tell you what it is, and deliver it where you're told.
| Quest | Level | Req. level | Side | Done |
|---|---|---|---|---|
16 | 10 | Horde | ||
16 | 10 | Horde | ||
17 | 13 | |||
18 | 14 | Horde | ||
18 | 13 | |||
18 | 14 | |||
21 | 15 | |||
22 | 10 | Horde | ||
26 | 15 |
Bosses
Cobrahn throws Lightning Bolts and heals himself with Healing Touch. His own twist is Cobrahn Serpent Form: at 30% health he shifts into a giant snake that swings slower but hits much harder, and from then on he puts players to sleep with Druid's Slumber. Interrupt every heal and have the tank ready for the serpent's hits.
 Cobrahn
 Druid's
A sleeping player wakes the moment they take damage, so a slept tank is a small problem. A slept healer is the real one. He drops Leggings of the Fang, the first of the four Embrace of the Viper pieces here.
 Leggings
 Tank
Tank
 Healer
 Damage
Abilities
- Lightning BoltCan be interrupted
He keeps his distance to cast it. Interrupt it.
- Healing TouchCan be interrupted
Heals himself or an ally (3-second cast). Interrupt it.
- Cobrahn Serpent Form
 TankImportant
At 30% health he turns into a serpent: slower but heavier blows, and he starts putting players to sleep.
- Cobrahn's Grasp (Rare)
- Leggings of the Fang (Rare)
- Robe of the Moccasin (Rare)
 Cobrahn's
 Robe
RobeAnacondra heals with Healing Touch, puts a player to sleep with Druid's Slumber and hits anyone who attacks her in melee with Nature damage from Thorns Aura. Interrupt the heals and she goes down fast. Pull any Druids of the Fang near her first, so you never face two healers at once.
She drops Belt of the Fang for the set, and Snakeskin Bag, a 10-slot bag anyone can use.
 Belt
Belt Snakeskin
Tank
Healer
Damage
Abilities
- Healing TouchCan be interrupted
Heals herself or an ally. Interrupt it.
- SleepMagic effect
Puts a player to sleep for up to 20 seconds. Damage wakes them, and a Magic dispel removes it.
- Thorns Aura
 Damage dealers
Nature damage to whoever hits her in melee.
- Belt of the Fang (Rare)
- Serpent's Shoulders (Rare)
- Snakeskin Bag (Uncommon)
- Snake Eye Kaleidoscope (Rare)New in Forever
 Serpent's
 Snake
SnakeKresh is a giant turtle and an optional kill: the final event doesn't need him. His Shell Shield cuts the damage he takes by 60% for 12 seconds. Take him for Kresh's Back, a shield with bonus defense for tanks.
 Kresh's
Abilities
- Shell ShieldDamage dealers
For 12 seconds he takes 60% less damage, and attacks slower but harder.
- Kresh's Back (Rare)
- Worn Turtle Shell Shield (Rare)
- Cloak of Hermitic Bliss (Rare)New in Forever
 Worn
Worn Cloak
CloakPythas is the third Fanglord. He heals with Healing Touch, puts a player to sleep with Druid's Slumber, and his Thunderclap hits everyone near him with Nature damage and slows attacks and movement for 10 seconds. Interrupt every heal, and keep the tank healthy enough to ride out a sleeping healer.
He drops Armor of the Fang, the chest of the Embrace of the Viper set, and Stinging Viper, a mace that poisons its target.
 Armor
Armor Stinging
Tank
Healer
Damage
Abilities
- Thunderclap
 HealersMagic effect
Nature damage to everyone near him, then slower attacks and movement for 10 seconds.
- Healing TouchCan be interrupted
Heals himself or an ally. Interrupt it.
- SleepMagic effect
Puts a player to sleep for up to 20 seconds.
- Stinging Viper (Rare)
- Armor of the Fang (Rare)
- Slither Cord (Rare)New in Forever
 Slither
Skum is a giant lizard and another optional kill. His Chained Bolt jumps to a second player, so interrupt it. Take him if someone wants Glowing Lizardscale Cloak, an Agility cloak, or Tail Spike, a dagger with Strength and Agility.
 Glowing
 Tail
TailAbilities
- Chained BoltCan be interrupted
A lightning bolt that jumps to a second player. Interrupt it.
- Glowing Lizardscale Cloak (Rare)
- Tail Spike (Rare)
- Skum's Bucket (Rare)New in Forever
 Skum's
Serpentis is the last Fanglord. He throws Lightning Bolts from range, heals with Healing Touch and puts players to sleep. Interrupt the bolts and the heals. With all four Fanglords dead, the Disciple of Naralex will start the final event.
He drops Venomstrike, a bow for Hunters, and Footpads of the Fang for the set.
 Venomstrike
 Footpads
Tank
Healer
Damage
Abilities
- Healing TouchCan be interrupted
A slow heal (3.5 seconds) on himself or an ally. Interrupt it.
- SleepMagic effect
Puts a player to sleep for up to 20 seconds.
- Lightning BoltCan be interrupted
He keeps his distance to cast it. Interrupt it.
- Venomstrike (Rare)
- Serpent Gloves (Rare)
- Footpads of the Fang (Rare)
- Savage Trodders (Rare)
 Serpent
 Savage
Verdan is a giant plant creature on the Crag of the Everliving, and an optional kill. His Grasping Vines knocks down and roots everyone near him, so keep the healer and ranged players well out of his reach.
 Grasping
He drops Living Root, a staff with a big healing bonus for this level.
 Living
Tank
Healer
Damage
Abilities
- Grasping VinesImportant
When his target is close, he knocks down and roots everyone near him for 10 seconds. Ranged players, keep your distance.
- Seedcloud Buckler (Rare)
- Living Root (Rare)
- Sporid Cape (Rare)
 Seedcloud
Mutanus only shows up through the Naralex event. Kill all four Fanglords, then go back to the Disciple of Naralex near the entrance and talk to him. He leads you through the caverns to Naralex and starts a ritual to wake him.
Waves of Deviate Moccasins and Nightmare Ectoplasms attack during the ritual: kill them and keep them off the Disciple. Then Mutanus the Devourer, a hulking murloc, joins the fight. Thundercrack hits everyone near him and stuns them for 2.5 seconds. He puts players to sleep with Naralex's Nightmare and fears his target with Terrify. When he dies, Naralex wakes.
He drops the Glowing Shard, which starts The Glowing Shard.
Tank
Healer
Damage
Abilities
- ThundercrackHealers
Nature damage to everyone near him and a 2.5-second stun.
- Naralex's NightmareMagic effectCan be interrupted
Puts a player to sleep for up to 15 seconds.
- TerrifyMagic effect
Makes a player flee in fear for 4 seconds.
- Slime-encrusted Pads (Rare)
- Mutant Scale Breastplate (Rare)
- Deep Fathom Ring (Rare)
- Glowing Shard (Common)
 Slime-encrusted
 Mutant
 Deep
Deep Glowing
Trash and pulls
- Druids of the Fang are the dangerous pulls. They cast Druid's Slumber and heal with Healing Touch: kill them first and interrupt the heals.
- The Druids of the Fang are Humanoids, so Sap and Polymorph hold them. The deviate raptors, wind serpents, vipers and adders are Beasts: Hibernate, Polymorph and Scare Beast all work. Deviate Shamblers are Elementals and Evolving Ectoplasms have no creature type, so none of those work on them.
- Damage breaks all of that crowd control, so keep AoE off controlled targets.
- The caverns branch and loop. Clear toward one Fanglord at a time and keep the group together.
Loot
The Fanglords carry the set, and the optional bosses carry some of the best single pieces:
- Leather: four Embrace of the Viper pieces, Leggings of the Fang from Cobrahn, Belt of the Fang from Anacondra, Armor of the Fang from Pythas and Footpads of the Fang from Serpentis. The set bonuses add Intellect, then Attack Power.
- Healers: Living Root from Verdan and Robe of the Moccasin from Cobrahn.
- Tanks: Kresh's Back from Kresh, and Mutant Scale Breastplate from Mutanus, a mail chest with Strength.
- Hunters: Venomstrike from Serpentis.
- Everyone: Snakeskin Bag from Anacondra, a 10-slot bag.
30 items
Cobrahn's Grasp (Rare) | Waist | Mail | 22 | 17 | 18% | |
|---|---|---|---|---|---|---|
Leggings of the Fang (Rare) | Legs | Leather | 22 | 17 | 17% | |
Robe of the Moccasin (Rare) | Chest | Cloth | 22 | 17 | 55% | |
Belt of the Fang (Rare) | Waist | Leather | 21 | 16 | 9.6% | |
Serpent's Shoulders (Rare) | Shoulder | Leather | 23 | 18 | 43% | |
Snakeskin Bag (Uncommon) | Bag | 25 | 4.7% | |||
Snake Eye Kaleidoscope (Rare)New in Forever | Neck | 22 | 17 | |||
Kresh's Back (Rare) | Off Hand | Shield | 23 | 18 | 13% | |
Worn Turtle Shell Shield (Rare) | Off Hand | Shield | 21 | 16 | 67% | |
Cloak of Hermitic Bliss (Rare)New in Forever | Back | 22 | 17 | |||
Stinging Viper (Rare) | One-Hand | One-Handed Mace | 24 | 19 | 30% | |
Armor of the Fang (Rare) | Chest | Leather | 23 | 18 | 55% | |
Slither Cord (Rare)New in Forever | Waist | Cloth | 22 | 17 | ||
Glowing Lizardscale Cloak (Rare) | Back | 23 | 18 | 45% | ||
Tail Spike (Rare) | One-Hand | Dagger | 21 | 17 | 47% | |
Skum's Bucket (Rare)New in Forever | Held In Off-hand | 22 | 17 | |||
Venomstrike (Rare) | Ranged | Bow | 24 | 19 | 17% | |
Serpent Gloves (Rare) | Hands | Cloth | 23 | 18 | 19% | |
Footpads of the Fang (Rare) | Feet | Leather | 22 | 17 | 21% | |
Savage Trodders (Rare) | Feet | Mail | 23 | 18 | 23% | |
Seedcloud Buckler (Rare) | Off Hand | Shield | 24 | 19 | 39% | |
Living Root (Rare) | Two-Hand | Staff | 23 | 18 | 38% | |
Sporid Cape (Rare) | Back | 22 | 17 | 20% | ||
Slime-encrusted Pads (Rare) | Shoulder | Cloth | 25 | 20 | 30% | |
Mutant Scale Breastplate (Rare) | Chest | Mail | 23 | 18 | 22% | |
Deep Fathom Ring (Rare) | Finger | 24 | 19 | 31% | ||
Glowing Shard (Common) | 15 | 15 | 68% | |||
Firebelcher (Rare) | Ranged | Wand | 23 | 18 | Deviate Faerie Dragon · rare | 42% |
Feyscale Cloak (Rare) | Back | 21 | 16 | Deviate Faerie Dragon · rare | 45% | |
Gloves of the Fang (Rare) | Hands | Leather | 19 | 14 | Trash mobs | 2.4% |
 Firebelcher
 Feyscale
 Gloves
Item sets
Embrace of the Viper
All 5 pieces drop hereTips
- Kill all four Fanglords before you talk to the Disciple of Naralex. He won't start the ritual until they're dead.
- Kresh, Skum and Verdan are optional. Skip them if your group is short on time: the event only needs the Fanglords.
- Assign interrupts before every Fanglord pull. Kick, Shield Bash and Earth Shock all stop Healing Touch.
- Druid's Slumber and Mutanus's Naralex's Nightmare are Magic effects: a Priest's Dispel Magic, from 18, wakes the sleeper.
- Loot the Glowing Shard from Mutanus: it starts a quest for both factions.
Changelog
- Guide published.
- Refreshed the page title and summary.
