Dungeon guide · 5 players
Scholomance
Darkmaster Gandling drops the helm of all nine dungeon sets. Open the Skeleton Key door, handle the Barovs and Kirtonos, and clear the six room bosses.
- Level range
- 58–60
- Enter at
- Level 33
- Players
- 5
- Location
- Western Plaguelands
- Bosses
- 15
- Region
- Eastern Kingdoms
On this page
Overview
Scholomance is the Scourge's school of necromancy, dug into the crypts beneath Caer Darrow. Darkmaster Gandling runs it, and its bosses hold the rooms around the chamber where he appears. On the way you meet the Barov family, a lich, a bone golem and a herald you have to summon yourself.
Groups come here in their late 50s and keep coming back at 60. Gandling drops the helm of all nine dungeon sets, the six room bosses share a table of cloth, leather, mail and plate pieces, and Ras Frostwhisper carries the epic Alanna's Embrace.
Getting there
Scholomance lies beneath Caer Darrow, the ruined keep on an island in Darrowmere Lake, in the Western Plaguelands. Cross to the island: the door to Scholomance is in Caer Darrow.
That door is locked. The Skeleton Key opens it, and one key opens it for the whole group. A Rogue with 280 Lockpicking can pick the same lock instead. Making the key takes a trip to Un'Goro Crater: you fill a Skeleton Key Mold with lava from the top of Fire Plume Ridge, along with two Thorium Bars, to cast the Unfinished Skeleton Key, and that key still needs its head. Pack the bars before you travel.
 Skeleton
 Skeleton
 Unfinished
Both factions run Scholomance. Barov Family Fortune has one version per faction, and Judgment and Redemption is Alliance-only; every other quest here is open to both.
Map
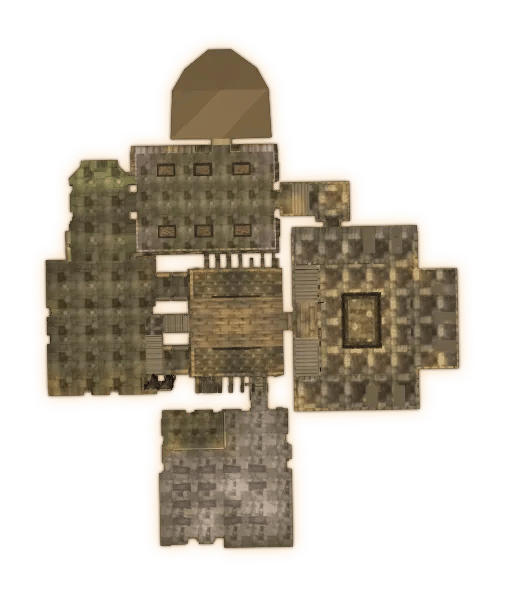
Hover or focus a pin for a quick look; select it for its details here.Tap a pin for its details here.
- Boss
- Entrance
- Quest
- Locked door
- Chest
- NPC
Quests
Pick these up before you zone in. The quests for Eva Sarkhoff and Magistrate Marduke all send you after bosses on your route, so they cost you almost nothing extra.
- Doctor Theolen Krastinov, the Butcher: kill Doctor Theolen Krastinov, then burn the Remains of Eva Sarkhoff and the Remains of Lucien Sarkhoff. Return to Eva Sarkhoff.
- Krastinov's Bag of Horrors: kill Jandice Barov and take Krastinov's Bag of Horrors from her corpse, for Eva Sarkhoff.
- Kirtonos the Herald: place the Blood of Innocents in the brazier on the porch, kill Kirtonos the Herald when he comes, and return to Eva Sarkhoff.
- The Lich, Ras Frostwhisper: use the Soulbound Keepsake on Ras Frostwhisper to turn him mortal, kill him and take the Human Head of Ras Frostwhisper to Magistrate Marduke. The same keepsake turns up in the Menethil's Gift quests in Stratholme.
- Barov Family Fortune and Barov Family Fortune: recover the four deeds of the Barov family fortune (Caer Darrow, Brill, Tarren Mill and Southshore). Horde players return them to Alexi Barov, Alliance players to Weldon Barov.
- Dawn's Gambit: place Dawn's Gambit in the Viewing Room, defeat Vectus and return to Betina Bigglezink.
- Plagued Hatchlings: kill 20 Plagued Hatchlings for Betina Bigglezink at Light's Hope Chapel.
- Healthy Dragon Scale starts from a Healthy Dragon Scale: bring it to Betina Bigglezink. Betina Bigglezink has you bring her the Frozen Eggs.
- Judgment and Redemption (Alliance): use the Divination Scryer in the heart of the Great Ossuary's basement, defeat the spirits it calls up and then Death Knight Darkreaver, and reclaim the fallen charger's soul.
- The Left Piece of Lord Valthalak's Amulet and The Right Piece of Lord Valthalak's Amulet: use the Brazier of Beckoning to summon the spirit of Kormok, kill him, and return to Bodley inside Blackrock Mountain.
 Healthy
| Quest | Level | Req. level | Side | Done |
|---|---|---|---|---|
58 | 55 | |||
58 | 55 | |||
60 | 52 | Horde | ||
60 | 52 | Alliance | ||
60 | 57 | |||
60 | 57 | |||
60 | 55 | |||
60 | 60 | Alliance | ||
60 | 55 | |||
60 | 55 | |||
60 | 58 | |||
60 | 57 | |||
60 | 58 |
Bosses
Scholomance has no wings: you clear it in one run. You summon Kirtonos the Herald on the porch, and Jandice Barov, Rattlegore, Marduk Blackpool, Vectus and Ras Frostwhisper hold the halls. Kormok only comes if you summon him in Ras's chamber. Six more bosses each hold a room around a central chamber, and they share one loot table. Kill all six and Darkmaster Gandling, the last boss, appears in that chamber.
Blood Steward of Kirtonos
Level 61
No guide text or ability data for this fight yet. The loot is from the game data.
Loot (1)
- Blood of Innocents (Common)
 Blood
BloodKirtonos the Herald isn't in Scholomance until you call him. Place the Blood of Innocents in the brazier on the porch and he comes for you. Jandice Barov and the Blood Steward of Kirtonos both drop the blood, so on a fresh run, kill one of them first. His drops include Boots of Valor from Battlegear of Valor.
 Boots
BootsDuring the fight he switches between a gargoyle form and an undead humanoid form. Swoop stuns and Wing Flap knocks back everyone in a cone in front of him. He also disarms the tank, puts Curse of Tongues on players to slow their casting, and takes control of one with Dominate Mind. Keep him facing away from the group, remove the curse, and crowd-control anyone he dominates.
 Tank
Tank
 Healer
 Damage
- Boots of Valor (Rare)
- Heart of the Fiend (Rare)
- Stoneform Shoulders (Rare)
- Loomguard Armbraces (Rare)
- Gargoyle Slashers (Rare)
- Clutch of Andros (Rare)
- Windreaver Greaves (Rare)
- Frightalon (Rare)
- Gravestone War Axe (Rare)
 Heart
Heart Stoneform
 Loomguard
 Gargoyle
 Clutch
 Windreaver
 Frightalon
 Gravestone
Jandice fights alone until she casts Summon Illusions: a crowd of Illusions of Jandice Barov joins the fight, and the real Jandice hides among them. Area damage is the fastest way through the illusions. Once they're gone, the real one is the one left standing.
 Summon
Kill her for Krastinov's Bag of Horrors, and a chance at the Blood of Innocents that summons Kirtonos.
Tank
Healer
Damage
- Dreadmist Mantle (Rare)
- Royal Cap Spaulders (Rare)
- Phantasmal Cloak (Rare)
- Darkshade Gloves (Rare)
- Ghostloom Leggings (Rare)
- Wraithplate Leggings (Rare)
- Barovian Family Sword (Rare)
- Staff of Metanoia (Rare)
- Blood of Innocents (Common)
 Dreadmist
 Royal
Royal Phantasmal
 Darkshade
 Ghostloom
 Wraithplate
 Barovian
 Staff
StaffRattlegore holds the Great Ossuary, and he's a melee fight. He lands a heavy Strike on the tank, throws them back with Knock Away, and uses War Stomp to stun everyone near him.
He drops the Viewing Room Key, which opens the Viewing Room door: you need it for Dawn's Gambit. He also drops Top Half of Advanced Armorsmithing: Volume II, the other half of the plans from the Crimson Hammersmith in Stratholme.
 Viewing
 Top
TopTank
Healer
Damage
- Shadowcraft Boots (Rare)
- Bone Ring Helm (Rare)
- Deadwalker Mantle (Rare)
- Bone Golem Shoulders (Rare)
- Corpselight Greaves (Rare)
- Rattlecage Buckler (Rare)
- Frightskull Shaft (Rare)
- Top Half of Advanced Armorsmithing: Volume II (Rare)
- Viewing Room Key (Common)
 Shadowcraft
 Bone
Bone Deadwalker
 Bone
Bone Corpselight
 Rattlecage
 Frightskull
Death Knight Darkreaver
Level 62
No guide text or ability data for this fight yet. The loot is from the game data.
Loot (4)
- Necromantic Band (Rare)
- Oblivion's Touch (Rare)
- Specter's Blade (Rare)
- Malicious Axe (Rare)
 Necromantic
 Oblivion's
 Specter's
 Malicious
Marduk Blackpool shares a room with Vectus and a class of Scholomance Students, beside the Viewing Room. His standout drop is the Ebon Hilt of Marduk, a main-hand sword.
- Death Knight Sabatons (Rare)
- Ebon Hilt of Marduk (Rare)
 Death
Death Ebon
EbonVectus is the target of Dawn's Gambit: place Dawn's Gambit in the Viewing Room first, then kill him. Cloth wearers, his Skullsmoke Pants are the drop to watch for.
- Dark Advisor's Pendant (Rare)
- Skullsmoke Pants (Rare)
 Dark
Dark Skullsmoke
Ras Frostwhisper is a frost caster, and his fight is about interrupts and dispels. He casts Frostbolt and Frostbolt Volley, which hits the whole group; stuns a player with Freeze; fears another; and blasts everyone near him with Chill Nova, which knocks them back. Interrupt Frostbolt Volley and Freeze, and dispel Freeze and Fear: both are magic.
 Chill
ChillHe's also the lich behind The Lich, Ras Frostwhisper: use the Soulbound Keepsake on him to turn him mortal, then kill him and take the Human Head of Ras Frostwhisper. His chamber is where you summon Kormok. He drops the epic Alanna's Embrace and Recipe: Flask of Supreme Power.
 Recipe:
Tank
Healer
Damage
- Alanna's Embrace (Epic)
- Magister's Mantle (Rare)
- Death's Clutch (Rare)
- Freezing Lich Robes (Rare)
- Shivery Handwraps (Rare)
- Boneclenched Gauntlets (Rare)
- Frostbite Girdle (Rare)
- Maelstrom Leggings (Rare)
- Shadowy Mail Greaves (Rare)
- Spellbound Tome (Rare)
- Intricately Runed Shield (Rare)
- Iceblade Hacker (Rare)
- Bonechill Hammer (Rare)
- Recipe: Flask of Supreme Power (Uncommon)
 Alanna's
 Magister's
 Freezing
 Shivery
 Boneclenched
 Frostbite
 Shadowy
 Spellbound
 Iceblade
Kormok
Kormok only comes when someone summons him in Ras Frostwhisper's chamber with the Brazier of Beckoning from The Left Piece of Lord Valthalak's Amulet or The Right Piece of Lord Valthalak's Amulet. During the fight he calls up Bone Minions and Bone Mages. The Bone Mages are elite and the Bone Minions aren't, so kill or crowd-control the mages first. He's an optional kill for the quest.
Malicia holds one of the six rooms around Gandling's chamber. Besides the shared table, she drops Shadowcraft Bracers.
 Shadowcraft
- Shadowcraft Bracers (Rare)
- Burial Shawl (Rare)
- Necropile Mantle (Rare)
- Necropile Robe (Rare)
- Cadaverous Armor (Rare)
- Bloodmail Hauberk (Rare)
- Deathbone Chestplate (Rare)
- Necropile Cuffs (Rare)
- Cadaverous Gloves (Rare)
- Bloodmail Gauntlets (Rare)
- Deathbone Gauntlets (Rare)
- Cadaverous Belt (Rare)
- Bloodmail Belt (Rare)
- Deathbone Girdle (Rare)
- Necropile Leggings (Rare)
- Cadaverous Leggings (Rare)
- Ghoul Skin Leggings (Rare)
- Bloodmail Legguards (Rare)
- Deathbone Legguards (Rare)
- Necropile Boots (Rare)
- Cadaverous Walkers (Rare)
- Bloodmail Boots (Rare)
- Deathbone Sabatons (Rare)
- Dimly Opalescent Ring (Rare)
- Libram of Divinity (Rare)
- Totem of Sustaining (Rare)
- Ancient Bone Bow (Rare)
- Hammer of the Vesper (Rare)
 Burial
 Necropile
 Cadaverous
 Bloodmail
 Deathbone
 Bloodmail
 Deathbone
 Cadaverous
 Bloodmail
 Cadaverous
 Ghoul
Ghoul Bloodmail
 Necropile
 Dimly
Dimly Libram
 Totem
Totem Ancient
The Butcher is Eva Sarkhoff's target: kill him, then burn the Remains of Eva Sarkhoff and the Remains of Lucien Sarkhoff for Doctor Theolen Krastinov, the Butcher. His own drops are Magister's Gloves and the Sawbones Shirt.
 Magister's
 Sawbones
- Magister's Gloves (Rare)
- Sawbones Shirt (Common)
- Burial Shawl (Rare)
- Necropile Mantle (Rare)
- Necropile Robe (Rare)
- Cadaverous Armor (Rare)
- Bloodmail Hauberk (Rare)
- Deathbone Chestplate (Rare)
- Necropile Cuffs (Rare)
- Cadaverous Gloves (Rare)
- Bloodmail Gauntlets (Rare)
- Deathbone Gauntlets (Rare)
- Cadaverous Belt (Rare)
- Bloodmail Belt (Rare)
- Deathbone Girdle (Rare)
- Necropile Leggings (Rare)
- Cadaverous Leggings (Rare)
- Ghoul Skin Leggings (Rare)
- Bloodmail Legguards (Rare)
- Deathbone Legguards (Rare)
- Necropile Boots (Rare)
- Cadaverous Walkers (Rare)
- Bloodmail Boots (Rare)
- Deathbone Sabatons (Rare)
- Dimly Opalescent Ring (Rare)
- Libram of Divinity (Rare)
- Totem of Sustaining (Rare)
- Ancient Bone Bow (Rare)
- Hammer of the Vesper (Rare)
Polkelt holds another of the six rooms. Besides the shared table, he drops Dreadmist Wraps from Dreadmist Raiment.
 Dreadmist
- Dreadmist Wraps (Rare)
- Burial Shawl (Rare)
- Necropile Mantle (Rare)
- Necropile Robe (Rare)
- Cadaverous Armor (Rare)
- Bloodmail Hauberk (Rare)
- Deathbone Chestplate (Rare)
- Necropile Cuffs (Rare)
- Cadaverous Gloves (Rare)
- Bloodmail Gauntlets (Rare)
- Deathbone Gauntlets (Rare)
- Cadaverous Belt (Rare)
- Bloodmail Belt (Rare)
- Deathbone Girdle (Rare)
- Necropile Leggings (Rare)
- Cadaverous Leggings (Rare)
- Ghoul Skin Leggings (Rare)
- Bloodmail Legguards (Rare)
- Deathbone Legguards (Rare)
- Necropile Boots (Rare)
- Cadaverous Walkers (Rare)
- Bloodmail Boots (Rare)
- Deathbone Sabatons (Rare)
- Dimly Opalescent Ring (Rare)
- Libram of Divinity (Rare)
- Totem of Sustaining (Rare)
- Ancient Bone Bow (Rare)
- Hammer of the Vesper (Rare)
The Ravenian holds another of the six rooms. Besides the shared table, he drops Wildheart Belt from Wildheart Raiment.
 Wildheart
- Wildheart Belt (Rare)
- Burial Shawl (Rare)
- Necropile Mantle (Rare)
- Necropile Robe (Rare)
- Cadaverous Armor (Rare)
- Bloodmail Hauberk (Rare)
- Deathbone Chestplate (Rare)
- Necropile Cuffs (Rare)
- Cadaverous Gloves (Rare)
- Bloodmail Gauntlets (Rare)
- Deathbone Gauntlets (Rare)
- Cadaverous Belt (Rare)
- Bloodmail Belt (Rare)
- Deathbone Girdle (Rare)
- Necropile Leggings (Rare)
- Cadaverous Leggings (Rare)
- Ghoul Skin Leggings (Rare)
- Bloodmail Legguards (Rare)
- Deathbone Legguards (Rare)
- Necropile Boots (Rare)
- Cadaverous Walkers (Rare)
- Bloodmail Boots (Rare)
- Deathbone Sabatons (Rare)
- Dimly Opalescent Ring (Rare)
- Libram of Divinity (Rare)
- Totem of Sustaining (Rare)
- Ancient Bone Bow (Rare)
- Hammer of the Vesper (Rare)
Lord Alexei Barov holds another of the six rooms. Besides the shared table, he drops Lightforge Bracers from Lightforge Armor.
 Lightforge
- Lightforge Bracers (Rare)
- Burial Shawl (Rare)
- Necropile Mantle (Rare)
- Necropile Robe (Rare)
- Cadaverous Armor (Rare)
- Bloodmail Hauberk (Rare)
- Deathbone Chestplate (Rare)
- Necropile Cuffs (Rare)
- Cadaverous Gloves (Rare)
- Bloodmail Gauntlets (Rare)
- Deathbone Gauntlets (Rare)
- Cadaverous Belt (Rare)
- Bloodmail Belt (Rare)
- Deathbone Girdle (Rare)
- Necropile Leggings (Rare)
- Cadaverous Leggings (Rare)
- Ghoul Skin Leggings (Rare)
- Bloodmail Legguards (Rare)
- Deathbone Legguards (Rare)
- Necropile Boots (Rare)
- Cadaverous Walkers (Rare)
- Bloodmail Boots (Rare)
- Deathbone Sabatons (Rare)
- Dimly Opalescent Ring (Rare)
- Libram of Divinity (Rare)
- Totem of Sustaining (Rare)
- Ancient Bone Bow (Rare)
- Hammer of the Vesper (Rare)
Lady Illucia Barov holds the sixth room, and she drops only the shared table. Once she and the other five are dead, Darkmaster Gandling appears.
- Burial Shawl (Rare)
- Necropile Mantle (Rare)
- Necropile Robe (Rare)
- Cadaverous Armor (Rare)
- Bloodmail Hauberk (Rare)
- Deathbone Chestplate (Rare)
- Necropile Cuffs (Rare)
- Cadaverous Gloves (Rare)
- Bloodmail Gauntlets (Rare)
- Deathbone Gauntlets (Rare)
- Cadaverous Belt (Rare)
- Bloodmail Belt (Rare)
- Deathbone Girdle (Rare)
- Necropile Leggings (Rare)
- Cadaverous Leggings (Rare)
- Ghoul Skin Leggings (Rare)
- Bloodmail Legguards (Rare)
- Deathbone Legguards (Rare)
- Necropile Boots (Rare)
- Cadaverous Walkers (Rare)
- Bloodmail Boots (Rare)
- Deathbone Sabatons (Rare)
- Dimly Opalescent Ring (Rare)
- Libram of Divinity (Rare)
- Totem of Sustaining (Rare)
- Ancient Bone Bow (Rare)
- Hammer of the Vesper (Rare)
Gandling only appears once all six room bosses are dead, in the chamber at the center of their rooms. During the fight he casts Shadow Portal to send a player into one of the six rooms. The room's gate locks behind them and Risen Guardians rise inside; kill them and the gate opens so you can run back.
 Shadow
That's why you clear every room before you pull him, trash included: a player who lands in a room with enemies still up has a much harder fight. Gandling drops the helm of all nine dungeon sets, such as Magister's Crown and Helm of Valor, plus the epic Headmaster's Charge.
 Magister's
 Helm
HelmTank
Healer
Damage
- Headmaster's Charge (Epic)
- Pattern: Robe of the Void (Epic)
- Devout Crown (Rare)
- Magister's Crown (Rare)
- Dreadmist Mask (Rare)
- Shadowcraft Cap (Rare)
- Wildheart Cowl (Rare)
- Beaststalker's Cap (Rare)
- Coif of Elements (Rare)
- Lightforge Helm (Rare)
- Helm of Valor (Rare)
- Tombstone Breastplate (Rare)
- Vigorsteel Vambraces (Rare)
- Detention Strap (Rare)
- Boots of the Shrieker (Rare)
- Don Mauricio's Band of Domination (Rare)
- Bonecreeper Stylus (Rare)
- Silent Fang (Rare)
- Witchblade (Rare)
- Ace of Portals (Rare)
- Recipe: Major Mana Potion (Uncommon)
 Headmaster's
 Pattern:
 Devout
 Dreadmist
 Shadowcraft
 Wildheart
 Beaststalker's
 Coif
Coif Lightforge
 Tombstone
 Vigorsteel
 Detention
 Don
Don Silent
 Witchblade
 Ace
AceTrash and pulls
- Scholomance mixes undead with the humanoid cultists who raise them, so bring crowd control for both. Humanoid crowd control works on the Scholomance Adepts, Necromancers and the rest of the cultists, and Shackle Undead handles the Risen.
- The Plagued Hatchlings come in large numbers with their Scholomance Handlers. The hatchlings aren't elite: gather them, burn them down with area damage, and count to 20 for Plagued Hatchlings.
- Big groups of non-elite undead, like Risen Aberrations, are area-damage pulls. Let the tank gather them, then burn them down together.
- Before Gandling, clear all six rooms completely. Shadow Portal can drop anyone into any of them.
 Shackle
Loot
Scholomance's loot is built around sets. The standouts:
- Every class: Darkmaster Gandling drops the helm of all nine dungeon sets, such as Magister's Crown and Helm of Valor.
- Tanks: the Deathbone Guardian plate set from the six room bosses (Deathbone Chestplate and four more pieces), built on Stamina and defense, and Boneclenched Gauntlets from Ras Frostwhisper.
- Casters and healers: Ras Frostwhisper's epic robe Alanna's Embrace and Gandling's epic staff Headmaster's Charge. The six room bosses add the Necropile cloth pieces, such as the Necropile Robe.
- Leather and mail: the Cadaverous leather and Bloodmail mail pieces from the six room bosses, such as the Cadaverous Armor and the Bloodmail Hauberk.
- Professions: Pattern: Robe of the Void and Recipe: Major Mana Potion from Gandling, Recipe: Flask of Supreme Power from Ras Frostwhisper and Top Half of Advanced Armorsmithing: Volume II from Rattlegore.
- Collectors: Ace of Portals from Gandling, the first card of the Portals set.
124 items
 Magister's
 Wildheart
 Bindings
 Invader's
 Minion's
 Skin
Skin Icy
Icy Bonebrace
 Belt
Belt Coldstone
 Innervating
 Formula:
Item sets
Necropile Raiment
All 5 pieces drop hereCadaverous Garb
All 5 pieces drop hereBloodmail Regalia
All 5 pieces drop hereDeathbone Guardian
All 5 pieces drop hereDreadmist Raiment
4 of its 8 pieces drop here Dreadmist
 Dreadmist
Magister's Regalia
4 of its 8 pieces drop here Magister's
 Magister's
 Magister's
Tips
- Bring the Skeleton Key, someone who has one, or a Rogue with 280 Lockpicking.
- On Dawn's Gambit, kill Rattlegore before Vectus: his Viewing Room Key opens the room the gambit needs.
- Keep the Blood of Innocents from the Blood Steward of Kirtonos (or Jandice) for Kirtonos's brazier.
- On The Lich, Ras Frostwhisper, have the Soulbound Keepsake in your bags before you reach Ras.
- Clear all six rooms, trash included, before you pull Gandling.
- Save your area damage for Jandice's illusions and the hatchlings.
Changelog
- Guide published.
- Refreshed the page title and summary.
