Dungeon guide · 5 players
Scarlet Monastery
Scarlet Monastery is four dungeons in one Tirisfal fortress. Pick your wing, unlock the Armory and Cathedral, and fight from Vishas to Whitemane.
- Level range
- 30–46
- Enter at
- Level 20
- Players
- 5
- Location
- Tirisfal Glades
- Bosses
- 8
- Region
- Eastern Kingdoms
On this page
Overview
The Scarlet Monastery is the Scarlet Crusade's fortress in Tirisfal Glades, and it's four dungeons under one roof: the Graveyard, the Library, the Armory and the Cathedral. Each wing is a separate run with its own bosses, so you clear one in a sitting and come back for the next as you level.
The wings get harder in that order, from Interrogator Vishas in the Graveyard to High Inquisitor Whitemane at the end of the Cathedral. Together they drop gear for every role through your 30s and into your 40s, and a single wing fits into an evening with time to spare.
Horde characters get the most out of it: five of its seven quests are Horde-only.
Getting there
The monastery stands in the northeast of Tirisfal Glades, deep in Forsaken territory. Horde players fly to the Undercity and ride out. Alliance players have the long trip into hostile land, so bring the whole group at once.
Each wing has its own entrance. The Graveyard and the Library are open to everyone. The Armory and the Cathedral are locked: someone in your group needs The Scarlet Key, or a Rogue with 175 Lockpicking, to open them. One key-holder opens the door for the whole group.
 The
TheMap
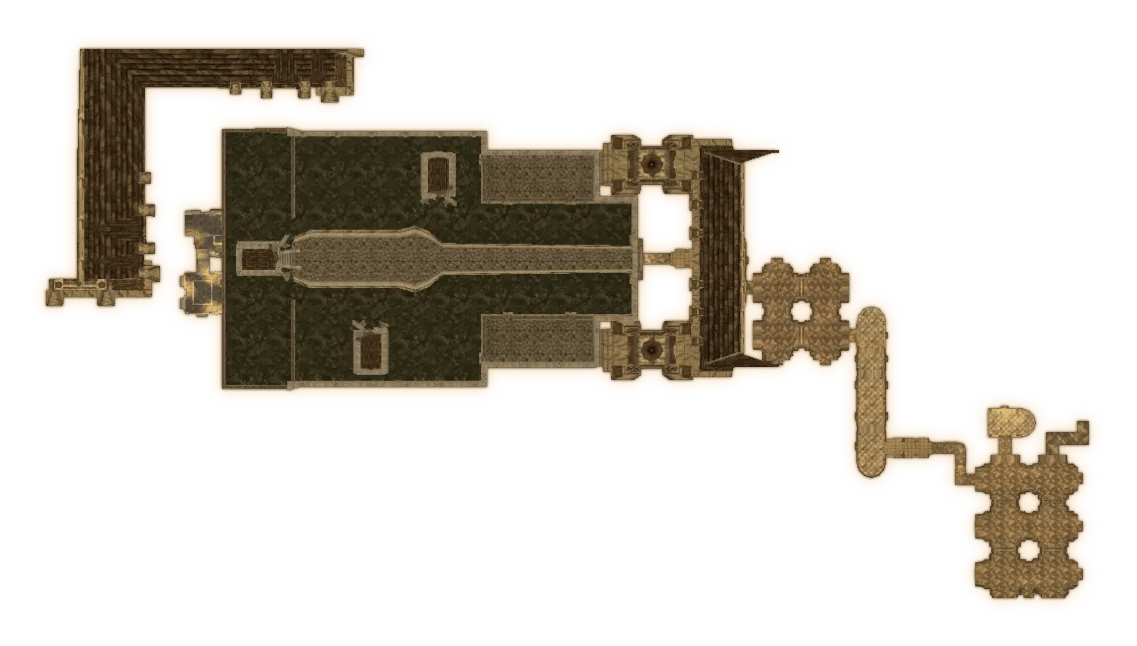
Hover or focus a pin for a quick look; select it for its details here.Tap a pin for its details here.
- Boss
- Entrance
- Quest
- Locked door
- Chest
Quests
The two kill quests are the big ones. Both factions get one that sends you after Houndmaster Loksey, Herod, Scarlet Commander Mograine and High Inquisitor Whitemane, so it pays out over three wings. Pick it up before your Library run.
- Into The Scarlet Monastery (Horde): kill High Inquisitor Whitemane, Scarlet Commander Mograine, Herod and Houndmaster Loksey, then report to Varimathras in the Undercity.
- In the Name of the Light (Alliance): the same four kills, reported to Raleigh the Devout in Southshore.
- Hearts of Zeal (Horde): 20 Hearts of Zeal for Master Apothecary Faranell in the Undercity.
- Test of Lore (Horde): find The Beginnings of the Undead Threat and bring it to Parqual Fintallas in the Undercity.
- Compendium of the Fallen (Horde): retrieve the Compendium of the Fallen from the Monastery for Sage Truthseeker in Thunder Bluff.
- Mythology of the Titans (Alliance): retrieve Mythology of the Titans from the Monastery for Librarian Mae Paledust in Ironforge.
- Vorrel's Revenge (Horde): return Vorrel Sengutz's wedding ring to Monika Sengutz in Tarren Mill.
| Quest | Level | Req. level | Side | Done |
|---|---|---|---|---|
33 | 30 | Horde | ||
33 | 25 | Horde | ||
36 | 25 | Horde | ||
38 | 28 | Horde | ||
38 | 28 | Alliance | ||
40 | 34 | Alliance | ||
42 | 33 | Horde |
Graveyard
The Graveyard is the first and quickest wing: two bosses and the Crusade's restless dead. Run it first.
The Crusade's interrogator is the Graveyard's first boss, and a simple fight. His one trick is Shadow Word: Pain, a dispellable damage-over-time spell: dispel it or heal through it, and burn him down.
His Bloody Brass Knuckles is a fist weapon with 12 Attack Power, a solid pick-up for melee at this point.
 Bloody
- Torturing Poker (Rare)
- Bloody Brass Knuckles (Rare)
 Torturing
Thalnos waits at the end of the Graveyard, its last boss. He's a spellcaster, so interrupts and stuns cut his damage, and a line-of-sight pull brings him to your tank instead of letting him cast from where he stands. Clear the packs around him first so he fights alone.
Casters want his Orb of the Forgotten Seer, an off-hand with spell power.
 Orb
Orb- Orb of the Forgotten Seer (Rare)
- Bloodmage Mantle (Uncommon)
 Bloodmage
Library
The Library is the second wing, longer than the Graveyard, with two bosses: Houndmaster Loksey and Arcanist Doan.
Loksey never fights alone: his Scarlet Tracking Hounds come with him. The hounds are elite, so treat the pull as a pack, not a single boss. Kill the hounds first, then Loksey. Every hound that drops takes pressure off your tank and healer.
His Loksey's Training Stick is a staff with 60 Attack Power when fighting Beasts.
 Loksey's
 Tank
Tank
 Healer
 Damage
- Loksey's Training Stick (Rare)
- Dog Training Gloves (Uncommon)
- Dog Whistle (Uncommon)
 Dog
Dog Dog
DogDoan guards the end of the Library, and the fight turns on one moment. At half health he wraps himself in Arcane Bubble and starts casting Detonation, a long cast. Everyone, tank included, runs well away from him before it finishes, then comes straight back to kill him.
 Arcane
 Detonation
Watch his health bar the whole fight so nobody gets caught. His Illusionary Rod is a caster staff with Intellect, Spirit and Stamina.
 Illusionary
Tank
Healer
Damage
- Hypnotic Blade (Rare)
- Illusionary Rod (Rare)
- Mantle of Doan (Uncommon)
- Robe of Doan (Uncommon)
 Hypnotic
 Robe
RobeArmory
The Armory opens with The Scarlet Key or 175 Lockpicking, and it holds a single boss at the end: Herod, the Scarlet Champion.
Herod is a heavy melee fight with one big move. Every so often he spins into Whirlwind and hits everyone around him. When he starts, everyone except the tank gets out of reach until the spin stops, then comes back in.
The fight isn't over when he dies. A crowd of Scarlet Trainees charges in right after. They're weak, non-elite recruits: bunch them up on the tank and AoE them down.
His Ravager is a two-handed axe that sometimes spins you into a whirlwind of your own.
 Ravager
Tank
Healer
Damage
- Raging Berserker's Helm (Rare)
- Herod's Shoulder (Rare)
- Scarlet Leggings (Rare)
- Ravager (Rare)
 Raging
 Herod's
 Scarlet
Cathedral
The Cathedral opens the same way as the Armory. It's the last and hardest wing, home to the Crusade's leaders.
High Inquisitor Fairbanks is undead, unlike the Crusaders around him. His drops cover three armor types, and the pick for healers is Inquisitor's Shawl, cloth shoulders with healing power.
 Inquisitor's
- Inquisitor's Shawl (Uncommon)
- Branded Leather Bracers (Uncommon)
- Dusty Mail Boots (Uncommon)
 Branded
 Dusty
DustyScarlet Commander Mograine
Level 42
No guide text or ability data for this fight yet. The loot is from the game data.
Loot (4)
- Gauntlets of Divinity (Rare)
- Scarlet Leggings (Rare)
- Aegis of the Scarlet Commander (Rare)
- Mograine's Might (Rare)
 Gauntlets
 Aegis
Aegis Mograine's
This card covers the Cathedral's final fight, which is two bosses in a row. Scarlet Commander Mograine waits at the far end of the cathedral hall. Clear the whole hall before you pull him, so nothing joins the fight.
Kill Mograine, and Whitemane comes out to avenge him. At half health she casts Deep Sleep, putting everyone near her to sleep, and uses Scarlet Resurrection to bring Mograine back. A sleeper wakes on taking damage or when the sleep runs out. Then you fight both: the tank holds Mograine while the damage dealers finish Whitemane, who's already at half health.
 Deep
Deep Scarlet
Whitemane drops Hand of Righteousness, a healer's mace. Tanks want Mograine's Aegis of the Scarlet Commander.
 Hand
HandTank
Healer
Damage
- Whitemane's Chapeau (Rare)
- Triune Amulet (Rare)
- Hand of Righteousness (Rare)
 Whitemane's
 Triune
Trash and pulls
- The Scarlet humanoids run when they're nearly dead. Stun, slow or finish a runner before it brings the next pack.
- Interrupt the healers first: Scarlet Adepts in the Library and Scarlet Abbots in the Cathedral heal their packs.
- Most of the monastery is humanoid, so your group's humanoid crowd control works in most pulls. The Graveyard's undead are the exception.
- The Graveyard has three rare elites, Ironspine, Azshir the Sleepless and Fallen Champion, that don't appear on every run. When one is up, treat it like a mini-boss.
- Before Mograine, clear the cathedral hall to the last pack. The Whitemane fight is hard enough without extra guests.
Loot
The loot climbs with the wings, and every role has a reason to come back:
- Casters: Illusionary Rod and Hypnotic Blade from Arcanist Doan, a staff with Intellect and Spirit and a dagger with spell power, and Orb of the Forgotten Seer from Bloodmage Thalnos.
- Healers: Hand of Righteousness from High Inquisitor Whitemane, with up to 15 healing, and Inquisitor's Shawl from High Inquisitor Fairbanks.
- Melee: Ravager and Raging Berserker's Helm from Herod, Gauntlets of Divinity from Scarlet Commander Mograine, Branded Leather Bracers from Fairbanks, and Scarlet Leggings, a Chain of the Scarlet Crusade set piece from both Herod and Mograine.
- Tanks: Aegis of the Scarlet Commander from Mograine and Dusty Mail Boots from Fairbanks, mail boots with Stamina.
- Early wings: Bloody Brass Knuckles from Interrogator Vishas and Loksey's Training Stick from Houndmaster Loksey carry melee through the Graveyard and Library levels.
62 items
Torturing Poker (Rare) | One-Hand | Dagger | 34 | 29 | 6.1% | |
|---|---|---|---|---|---|---|
Bloody Brass Knuckles (Rare) | One-Hand | Fist Weapon | 34 | 29 | 52% | |
Orb of the Forgotten Seer (Rare) | Held In Off-hand | 38 | 33 | 50% | ||
Bloodmage Mantle (Uncommon) | Shoulder | Cloth | 35 | 30 | 48% | |
Loksey's Training Stick (Rare) | Two-Hand | Staff | 36 | 31 | 14% | |
Dog Training Gloves (Uncommon) | Hands | Leather | 34 | 29 | 56% | |
Dog Whistle (Uncommon) | 30 | 25 | 25% | |||
Hypnotic Blade (Rare) | Main Hand | Dagger | 39 | 34 | 47% | |
Illusionary Rod (Rare) | Two-Hand | Staff | 39 | 34 | 47% | |
Mantle of Doan (Uncommon) | Shoulder | Cloth | 38 | 33 | 47% | |
Robe of Doan (Uncommon) | Chest | Cloth | 38 | 33 | 46% | |
Raging Berserker's Helm (Rare) | Head | Mail | 42 | 37 | 33% | |
Herod's Shoulder (Rare) | Shoulder | Mail | 42 | 37 | 34% | |
Scarlet Leggings (Rare) | Legs | Mail | 43 | 38 | Herod · 14%Scarlet Commander Mograine · 15%Trash mobs (Graveyard) · 14%Trash mobs (Library) · 14%Trash mobs (Armory) · 14%Trash mobs (Cathedral) · 14% | 14% |
Ravager (Rare) | Two-Hand | Two-Handed Axe | 42 | 37 | 14% | |
Inquisitor's Shawl (Uncommon) | Shoulder | Cloth | 41 | 36 | 34% | |
Branded Leather Bracers (Uncommon) | Wrist | Leather | 41 | 36 | 32% | |
Dusty Mail Boots (Uncommon) | Feet | Mail | 41 | 36 | 32% | |
Gauntlets of Divinity (Rare) | Hands | Mail | 44 | 39 | 20% | |
Off Hand | Shield | 44 | 39 | 43% | ||
Mograine's Might (Rare) | Two-Hand | Two-Handed Mace | 44 | 39 | 19% | |
Whitemane's Chapeau (Rare) | Head | Cloth | 44 | 39 | 38% | |
Triune Amulet (Rare) | Neck | 44 | 39 | 37% | ||
Hand of Righteousness (Rare) | Main Hand | One-Handed Mace | 44 | 39 | 19% | |
Blighted Leggings (Rare) | Legs | Cloth | 35 | 30 | Azshir the Sleepless (Graveyard) · rare | 31% |
Necrotic Wand (Rare) | Ranged | Wand | 35 | 30 | Azshir the Sleepless (Graveyard) · rare | 32% |
Ghostshard Talisman (Rare) | Neck | 35 | 30 | Azshir the Sleepless (Graveyard) · rare | 34% | |
Embalmed Shroud (Rare) | Head | Cloth | 35 | 30 | Fallen Champion (Graveyard) · rare | 39% |
Ebon Vise (Rare) | Hands | Leather | 35 | 30 | Fallen Champion (Graveyard) · rare | 39% |
Morbid Dawn (Rare) | Two-Hand | Two-Handed Sword | 35 | 30 | Fallen Champion (Graveyard) · rare | 18% |
Ironspine's Ribcage (Rare) | Chest | Mail | 35 | 30 | Ironspine (Graveyard) · rare | 33% |
Ironspine's Fist (Rare) | One-Hand | One-Handed Mace | 35 | 30 | Ironspine (Graveyard) · rare | 21% |
Ironspine's Eye (Rare) | Finger | 35 | 30 | Ironspine (Graveyard) · rare | 42% | |
Sunblaze Coif (Rare) | Head | Mail | 33 | 28 | Trash mobs (Graveyard) · 0.01%Trash mobs (Library) · 0.01%Trash mobs (Armory) · 0.01%Trash mobs (Cathedral) · 0.01% | 0.01% |
Watchman Pauldrons (Rare) | Shoulder | Leather | 32 | 27 | Trash mobs (Graveyard) · 0.02%Trash mobs (Library) · 0.02%Trash mobs (Armory) · 0.02%Trash mobs (Cathedral) · 0.02% | 0.02% |
Beguiler Robes (Rare) | Chest | Cloth | 34 | 29 | Trash mobs (Graveyard) · 0.01%Trash mobs (Library) · 0.01%Trash mobs (Armory) · 0.01%Trash mobs (Cathedral) · 0.01% | 0.01% |
Harbinger Boots (Rare) | Feet | Leather | 30 | 25 | Trash mobs (Graveyard) · 0.02%Trash mobs (Library) · 0.02%Trash mobs (Armory) · 0.02%Trash mobs (Cathedral) · 0.02% | 0.02% |
Scarlet Boots (Rare) | Feet | Mail | 35 | 30 | Trash mobs (Graveyard) · 0.01%Trash mobs (Library) · 0.01%Trash mobs (Armory) · 0.01%Trash mobs (Cathedral) · 0.01% | 0.01% |
Mark of Kern (Rare) | Finger | 36 | 31 | Trash mobs (Graveyard) · 0.01%Trash mobs (Library) · 0.01%Trash mobs (Armory) · 0.01%Trash mobs (Cathedral) · 0.01% | 0.01% | |
Resplendent Guardian (Rare) | Off Hand | Shield | 31 | 26 | Trash mobs (Graveyard) · 0.04%Trash mobs (Library) · 0.04%Trash mobs (Armory) · 0.04%Trash mobs (Cathedral) · 0.04% | 0.04% |
Chesterfall Musket (Rare) | Ranged | Gun | 33 | 28 | Trash mobs (Graveyard) · 0.01%Trash mobs (Library) · 0.01%Trash mobs (Armory) · 0.01%Trash mobs (Cathedral) · 0.01% | 0.01% |
Steelclaw Reaver (Rare) | Main Hand | One-Handed Axe | 38 | 33 | Trash mobs (Graveyard) · 0.01%Trash mobs (Library) · 0.01%Trash mobs (Armory) · 0.01%Trash mobs (Cathedral) · 0.01% | 0.01% |
Dreamslayer (Rare) | Main Hand | One-Handed Mace | 33 | 28 | Trash mobs (Graveyard) · 0.01%Trash mobs (Library) · 0.01%Trash mobs (Armory) · 0.01%Trash mobs (Cathedral) · 0.01% | 0.01% |
The Butcher (Rare) | Main Hand | One-Handed Sword | 31 | 26 | Trash mobs (Graveyard) · 0.02%Trash mobs (Library) · 0.02%Trash mobs (Armory) · 0.02%Trash mobs (Cathedral) · 0.02% | 0.02% |
Headsplitter (Rare) | One-Hand | One-Handed Axe | 30 | 25 | Trash mobs (Graveyard) · 0.02%Trash mobs (Library) · 0.02%Trash mobs (Armory) · 0.02%Trash mobs (Cathedral) · 0.02% | 0.02% |
Bloodspiller (Rare) | Two-Hand | Two-Handed Axe | 32 | 27 | Trash mobs (Graveyard) · 0.02%Trash mobs (Library) · 0.02%Trash mobs (Armory) · 0.02%Trash mobs (Cathedral) · 0.02% | 0.02% |
Cobalt Crusher (Rare) | Two-Hand | Two-Handed Mace | 34 | 29 | Trash mobs (Graveyard) · 0.02%Trash mobs (Library) · 0.02%Trash mobs (Armory) · 0.02%Trash mobs (Cathedral) · 0.02% | 0.02% |
Swampchill Fetish (Rare) | Held In Off-hand | 38 | 33 | Trash mobs (Graveyard) · 0.01%Trash mobs (Library) · 0.01%Trash mobs (Armory) · 0.01%Trash mobs (Cathedral) · 0.01% | 0.01% | |
Sliverblade (Rare) | One-Hand | Dagger | 37 | 32 | Trash mobs (Graveyard) · 0.01%Trash mobs (Library) · 0.01%Trash mobs (Armory) · 0.01%Trash mobs (Cathedral) · 0.01% | 0.01% |
Fight Club (Rare) | One-Hand | One-Handed Mace | 39 | 34 | Trash mobs (Graveyard) · 0%Trash mobs (Library) · 0%Trash mobs (Armory) · 0%Trash mobs (Cathedral) · 0% | 0% |
Flintrock Shoulders (Rare) | Shoulder | Leather | 38 | 33 | Trash mobs (Graveyard) · 0.01%Trash mobs (Library) · 0.01%Trash mobs (Armory) · 0.01%Trash mobs (Cathedral) · 0.01% | 0.01% |
Windweaver Staff (Rare) | Two-Hand | Staff | 37 | 32 | Trash mobs (Graveyard) · 0.01%Trash mobs (Library) · 0.01%Trash mobs (Armory) · 0.01%Trash mobs (Cathedral) · 0.01% | 0.01% |
Ruthless Shiv (Rare) | Two-Hand | Polearm | 39 | 34 | Trash mobs (Graveyard) · 0.01%Trash mobs (Library) · 0.01%Trash mobs (Armory) · 0.01%Trash mobs (Cathedral) · 0.01% | 0.01% |
Archon Chestpiece (Rare) | Chest | Mail | 38 | 33 | Trash mobs (Graveyard) · 0.01%Trash mobs (Library) · 0.01%Trash mobs (Armory) · 0.01%Trash mobs (Cathedral) · 0.01% | 0.01% |
Warchief Kilt (Rare) | Legs | Leather | 39 | 34 | Trash mobs (Graveyard) · 0%Trash mobs (Library) · 0%Trash mobs (Armory) · 0%Trash mobs (Cathedral) · 0% | 0% |
Tainted Pierce (Rare) | One-Hand | One-Handed Sword | 36 | 31 | Trash mobs (Graveyard) · 0.01%Trash mobs (Library) · 0.01%Trash mobs (Armory) · 0.01%Trash mobs (Cathedral) · 0.01% | 0.01% |
Scarlet Chestpiece (Rare) | Chest | Mail | 39 | 34 | Trash mobs (Graveyard) · 0.29%Trash mobs (Library) · 0.29%Trash mobs (Armory) · 0.29%Trash mobs (Cathedral) · 0.29% | 0.29% |
Scarlet Belt (Uncommon) | Waist | Mail | 37 | 32 | Trash mobs (Graveyard) · 2.3%Trash mobs (Library) · 2.3%Trash mobs (Armory) · 2.3%Trash mobs (Cathedral) · 2.3% | 2.3% |
Scarlet Gauntlets (Uncommon) | Hands | Mail | 38 | 33 | Trash mobs (Graveyard) · 2.1%Trash mobs (Library) · 2.1%Trash mobs (Armory) · 2.1%Trash mobs (Cathedral) · 2.1% | 2.1% |
Scarlet Wristguards (Uncommon) | Wrist | Mail | 36 | 31 | Trash mobs (Graveyard) · 2.3%Trash mobs (Library) · 2.3%Trash mobs (Armory) · 2.3%Trash mobs (Cathedral) · 2.3% | 2.3% |
The Scarlet Key (Uncommon) | 1 | Doan's Strongbox (Library) · object | ||||
Tabard of the Scarlet Crusade (Common) | Tabard | 1 | Trash mobs (Armory) |
 Blighted
 Ghostshard
 Embalmed
 Ebon
Ebon Morbid
 Ironspine's
 Ironspine's
 Ironspine's
 Sunblaze
 Watchman
 Harbinger
 Scarlet
 Mark
Mark Resplendent
 Chesterfall
 Steelclaw
 Dreamslayer
 The
The Headsplitter
 Bloodspiller
 Cobalt
 Swampchill
 Sliverblade
 Fight
Fight Flintrock
 Windweaver
 Ruthless
 Archon
 Warchief
 Tainted
 Scarlet
 Scarlet
 Scarlet
 Tabard
Item sets
Chain of the Scarlet Crusade
All 6 pieces drop hereTips
- Run the wings in order: Graveyard, Library, Armory, Cathedral. The bosses get tougher at every step.
- Take Into The Scarlet Monastery or In the Name of the Light before the Library. Loksey is its first kill, and the rest follow in the Armory and Cathedral.
- Watch Doan's health: at half, everyone runs.
- Keep your AoE ready when Herod dies. The Trainees are coming.
- Clear the cathedral hall before Mograine, and top everyone off before Whitemane reaches half health.
Changelog
- Guide published.
- Refreshed the page title and summary.
